Tiled for Deckplans
Background
I do not really use any VTT tools for running games, but folks running Traveller of various kinds often like having deckplans, at least for the ship owned or used by the PCs. While there is no shortage of deckplans out there, sometimes you just need a new, custom one. A fairly common source for making one’s own deckplans is the set of Starship Geomorphs created by Robert Pearce a few years ago. (Geomorphs, by the way, tile perfectly, so you can just replace one geomorph with another of the same shape, and the new one will fit everything around it correctly. See the examples a little later.) These are available as a fairly hefty CC-SA-NC licensed PDF.
While those are nice, using them from a PDF is a bit of a pain. Eric B Smith to the rescue: he made a version that has all of the geomorphs (and their components) as transparent png files. (Find them here: https://gurpsland.no-ip.org/geomorphs/ .) This makes them much easier to overlay and stitch together into a deckplan. Eric also made a few extra geomorphs, so they are worth checking out. The site suggests using Paint.Net but there are a few other things out there.
One of the more intriguing tools available is Tiled. This is a map editor for making tiled maps. It can either work with a single sheet of tiles or a series of images each containing a tile. Geomorphs are effectively just a single tile, which makes things quite a bit easier.
So, once Tiled is installed, unzip the collection of geomorphs somewhere convenient. These can then be added to a tileset.
Set-up
I found that the most important settings were the offset of the tileset and the origin of tiles, since the geomorphs have padding around the actual content (this allows for some things to be a little larger than others in one dimension). Setting these to be bottom-left and X = -120, Y = 70. This is only needed if the intent is to use them as actual tiles, not as objects. Alternatively, they can be left as-is, if you want them as objects. In that case, the origin of the tiles being set to centre is probably better. I also changed the background colour of the tileset to white, which makes it easier to see the tiles.
In terms of map settings, the grid should have a tile size of 50 x 50, which is the size of a square in the standard set of tiles. The background colour should also be set here, to white again. When exporting the images, there are options to include the background colour (which should be done) and the grid, which you may like to have.
From here, it is just a normal image, which can be imported into whatever VTT or whatever else you want to use.
Other Options
In addition to the premade geomorphs, there are a large number of separate components that could be used to make your own custom geomorphs and similar. Unfortunately, in general, these can not be snapped, since many of them are different sizes and do not have consistent padding. Some experimentation will be needed, but even so, snapping will not work for all elements of a given type. (I found that X = -110 and Y = 60 seemed to work as mostly reasonable offsets for a few of the sets that I tried though.)
Some Examples
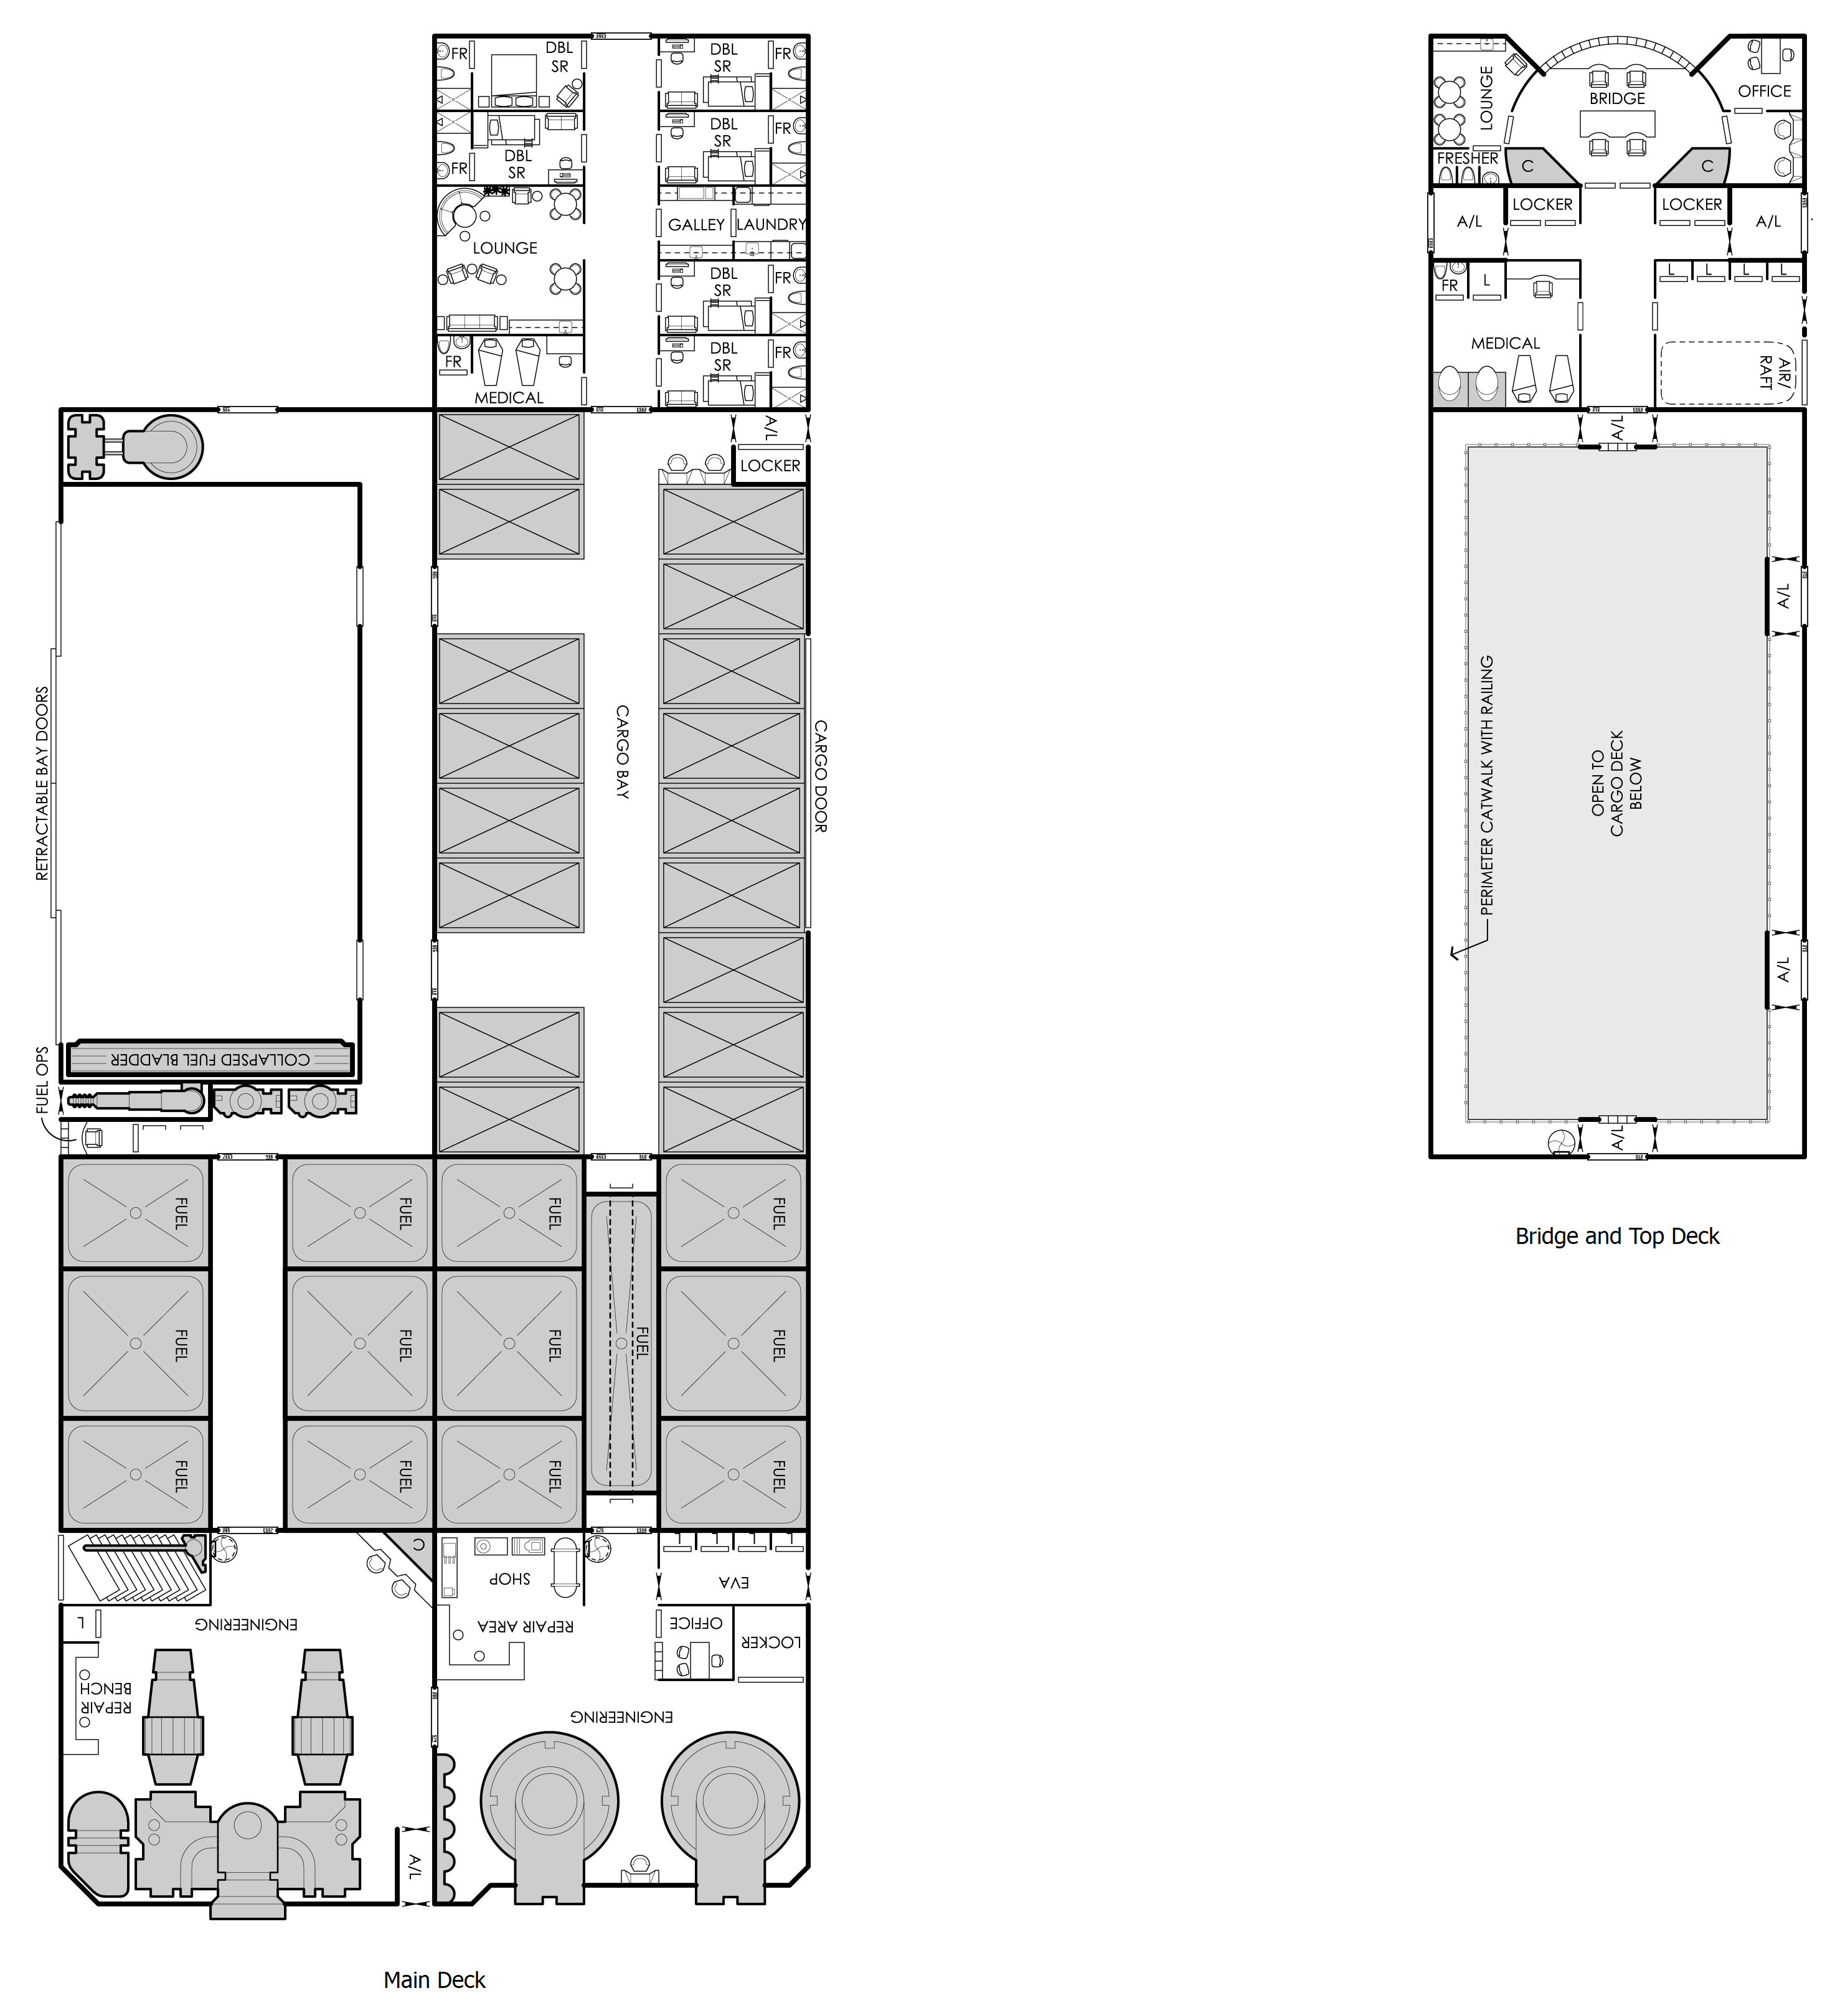
Tomutov Class Far Trader
A reasonably sized cargo vessel, probably a 200 to 300 ton Far Trader in Traveller terms, although I have not done the actual maths for this one (yet?). It has one double-height cargo bay and a collapsible fuel bladder, that can be used either for fuel or for additional cargo storage.

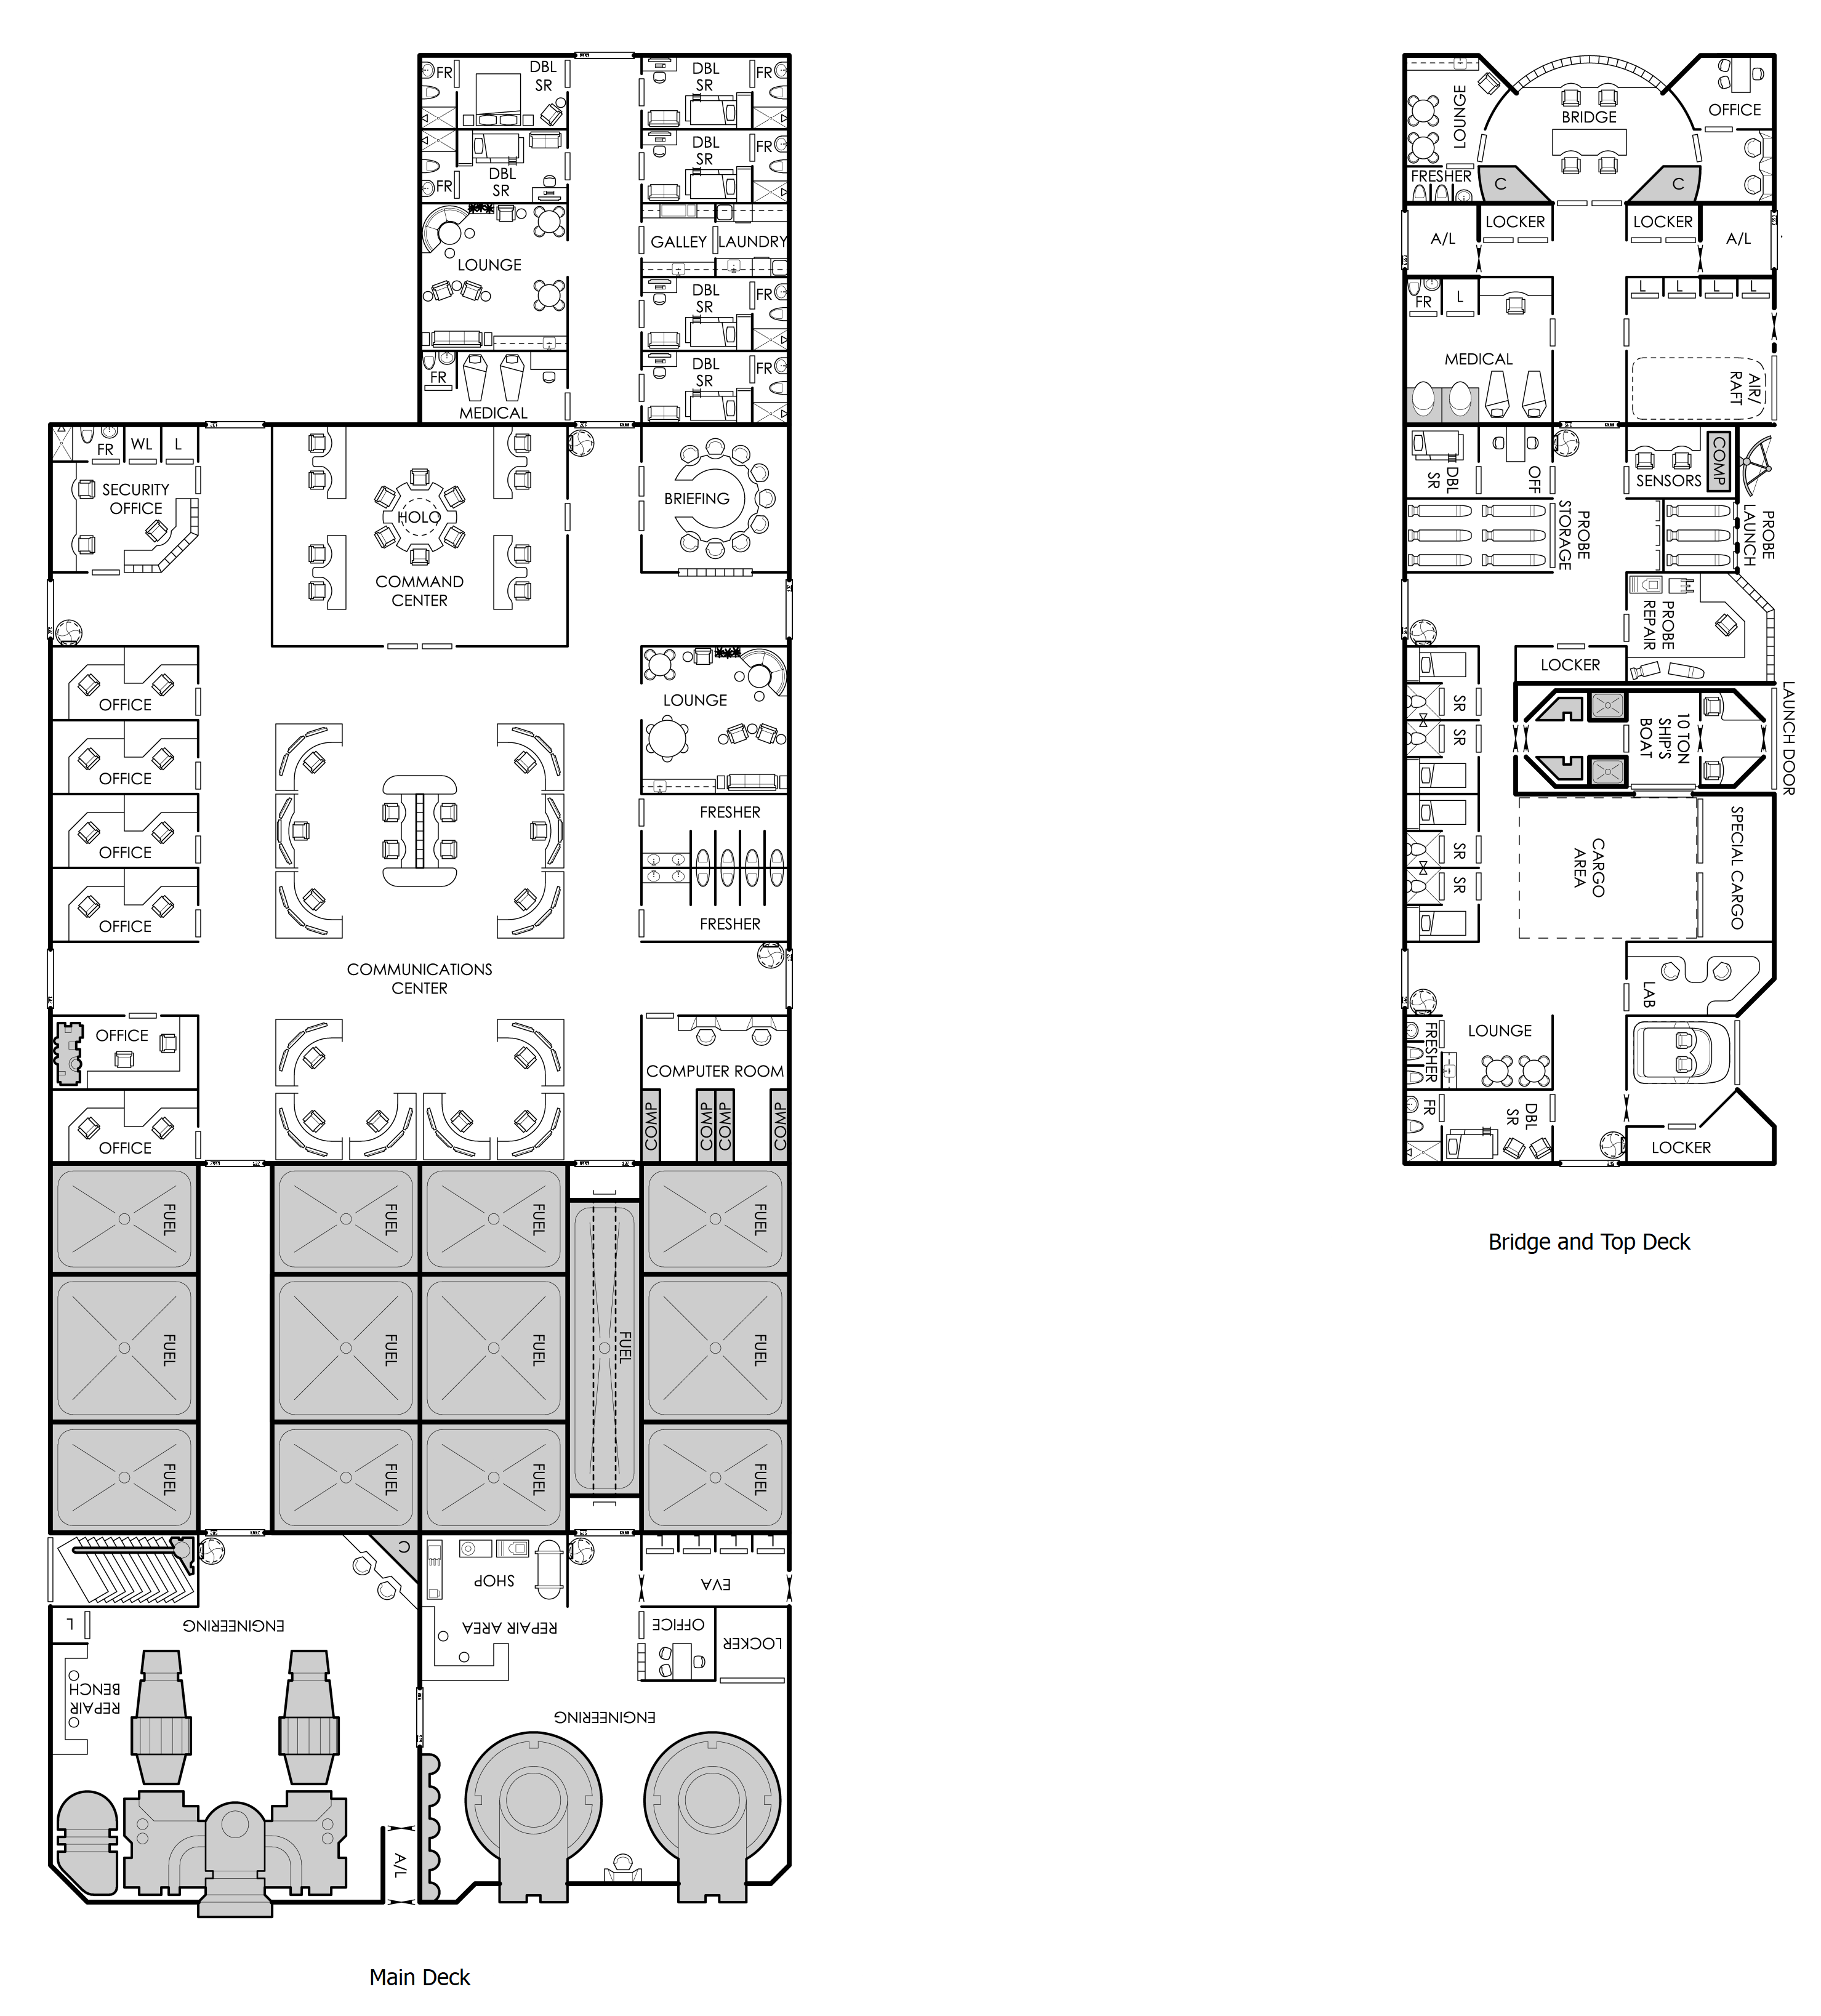
The joy of geomorphs is that variants can easily be made just by replacing some of the geomorphs. By replacing the cargo bay, for example, we can easily make a communications and survey vessel. This one is probably too small for sustained operations, so maybe it is more of an emergency command vessel or similar:

Conclusion
Hopefully the above guide is somewhat helpful to building new deckplans, so go forth and have fun with it!
Previous Post Next Post